Slow or failed page loads aren’t always caused by your internet connection — sometimes the culprit is outdated information sitting in your PC’s DNS cache. If clearing your browser’s cache and cookies didn’t help, the next step is to clear the DNS cache stored by Windows itself. Below are three reliable ways to flush DNS on Windows 10 and Windows 11.
What is the DNS cache and why does it matter?
DNS (Domain Name System) is the service that converts easy-to-remember website names, such as revocleaner.com, into the numeric IP addresses computers actually use to talk to one another. Every time you visit a site like google.com, your PC asks a DNS server to look up the matching IP address. To avoid repeating that lookup constantly, Windows keeps a local copy of recent results — this is the DNS cache — so future visits load a bit faster.
When you should clear the DNS cache
Normally your system keeps this cache up to date on its own. Trouble can appear when a website’s IP address changes and your PC is still holding the old entry, which can lead to pages that won’t load or connection errors. Flushing the DNS cache wipes out every saved entry, forcing Windows to look up fresh information the next time you browse, which typically clears up that kind of connectivity problem.
Three ways to flush DNS on Windows 10 or Windows 11
Through Command Prompt
- Open the Start menu, type
cmdin the search box, then choose Run as Administrator. - Enter the command
ipconfig /flushdnsand press Enter.
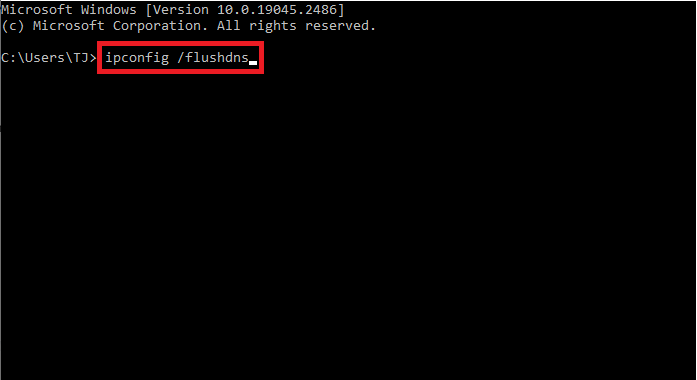
Once the command finishes, you should see a confirmation message that the DNS cache has been successfully flushed.
- Open the Start menu, type
Through Windows PowerShell
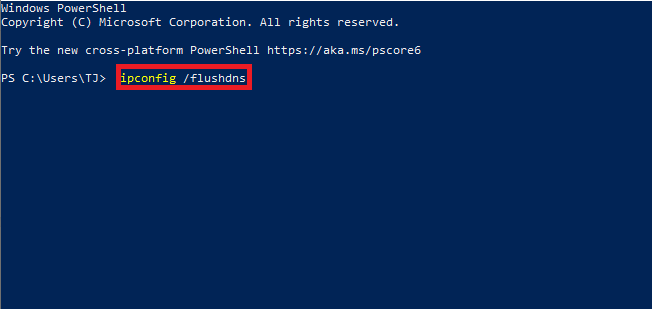
PowerShell offers the same result using nearly identical steps:
- Open the Start menu, type
PowerShellin the search bar, and select Run as administrator. - Type
ipconfig /flushdnsand press Enter to clear the cached entries.
- Open the Start menu, type
Through the Run dialog
- Press Win Key + R, type
ipconfig /flushdns, and hit Enter.
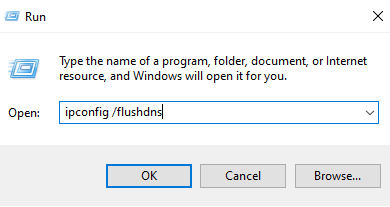
- Windows will silently clear the stored DNS records for you.
- Press Win Key + R, type
Despite the technical-sounding name, flushing the DNS cache is a quick, low-risk task that anyone can do.
Whether you prefer Command Prompt, PowerShell, or the Run dialog, Windows 10 and Windows 11 give you several equally effective ways to clear out stale DNS records.
If you’re dealing with sites that won’t load properly, flushing your DNS cache is worth trying first — it can restore normal connectivity and helps make sure you’re always reaching the current version of a site rather than an outdated cached address.

1 Comment
I have been using Revo Uninstaller for several years, it is the best Uninstaller ever. Revo always solves the problems of leftover files and registry entries.