When Windows 10 hits a critical error, like the notorious Blue Screen of Death, it writes a memory dump file to your drive. This file captures a snapshot of what your PC was doing right before it crashed, and it can be a useful clue when you're trying to figure out what went wrong.
That said, unless you're actually digging into the cause of a crash or sending the dump to Microsoft support for analysis, these files just sit there taking up space. Depending on the type of dump configured, they can grow to match the size of your installed RAM, and multiple crashes can leave several of them piling up.
If storage is tight or your crashing issue has already been fixed, here are several ways to get rid of memory dump files on Windows 10.
Ways to remove memory dump files on Windows 10:
- Clear dump files using Revo Uninstaller Pro
- Run Disk Cleanup
- Delete them from Windows Settings
- Use Command Prompt
- Delete the files manually from their folder
- Disable crash dumps going forward
Clear dump files using Revo Uninstaller Pro
- Launch Revo Uninstaller Pro
- Go to the Tools section
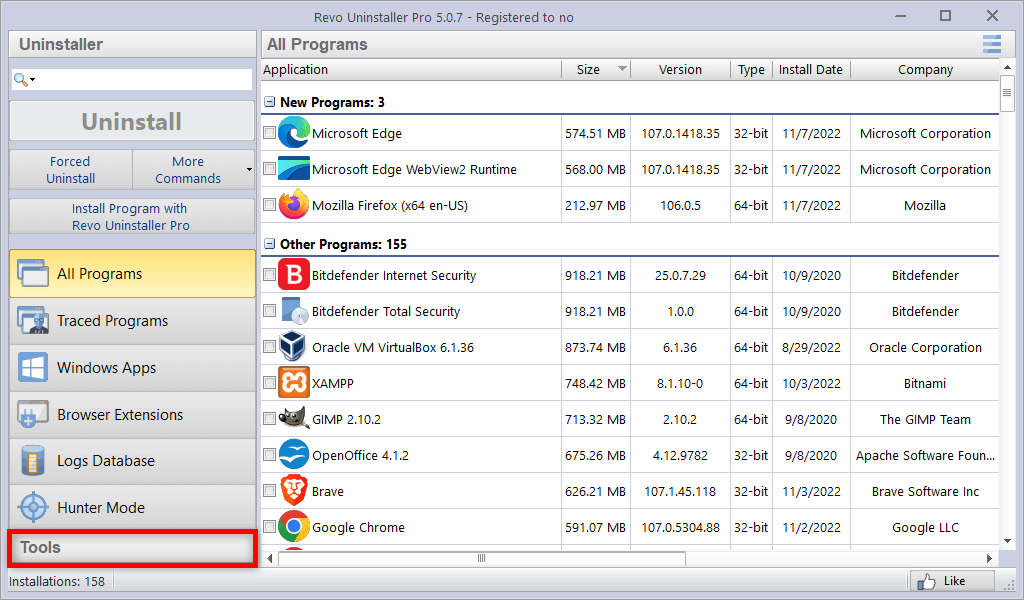
- Choose History Cleaner
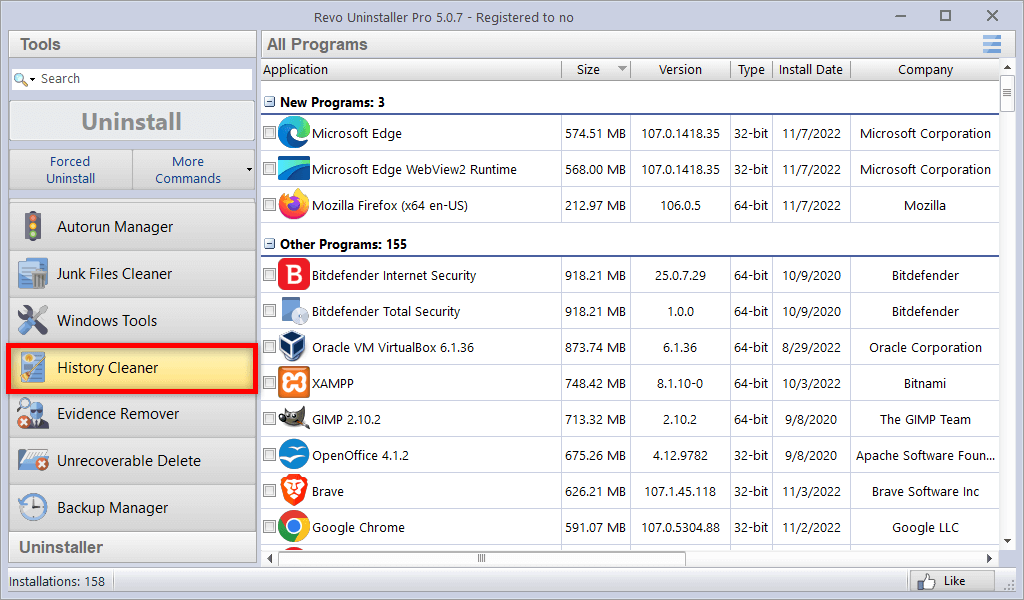
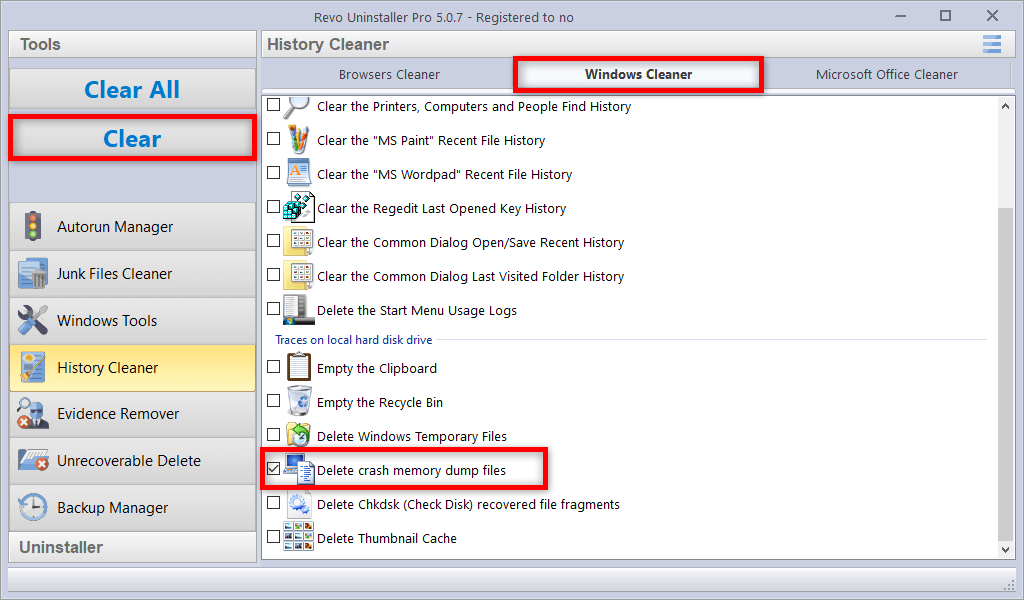
- Pick Windows Cleaner
- Tick the box for "Delete crash memory dump files"
- Press Clear
Run Disk Cleanup
- Open the Start Menu
- Type Disk Cleanup in the search box and open the top result
- Pick the drive to scan (dump files normally live on C:)
- Tick System error memory dump files and System error minidump files
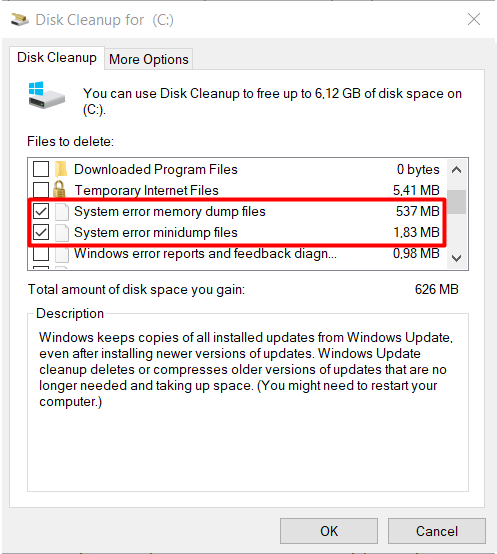
- Press OK to confirm
Once Disk Cleanup finishes, both the full memory dump and any minidump files will be gone.
Delete them from Windows Settings
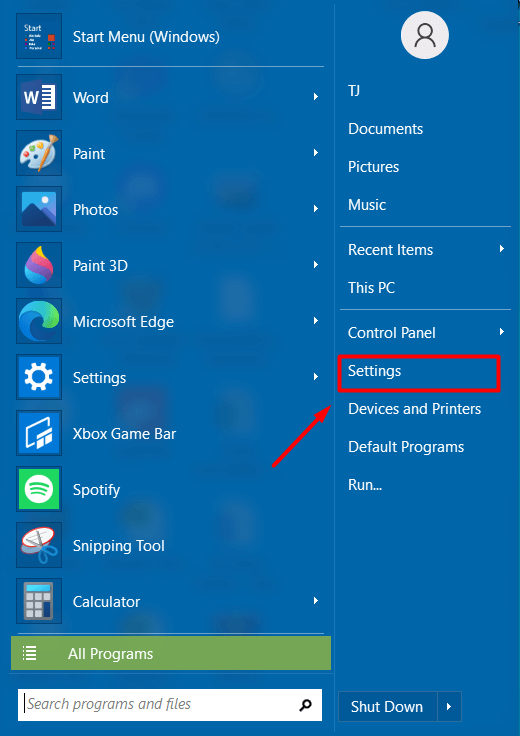
- Open the Start Menu and click the gear icon for Settings
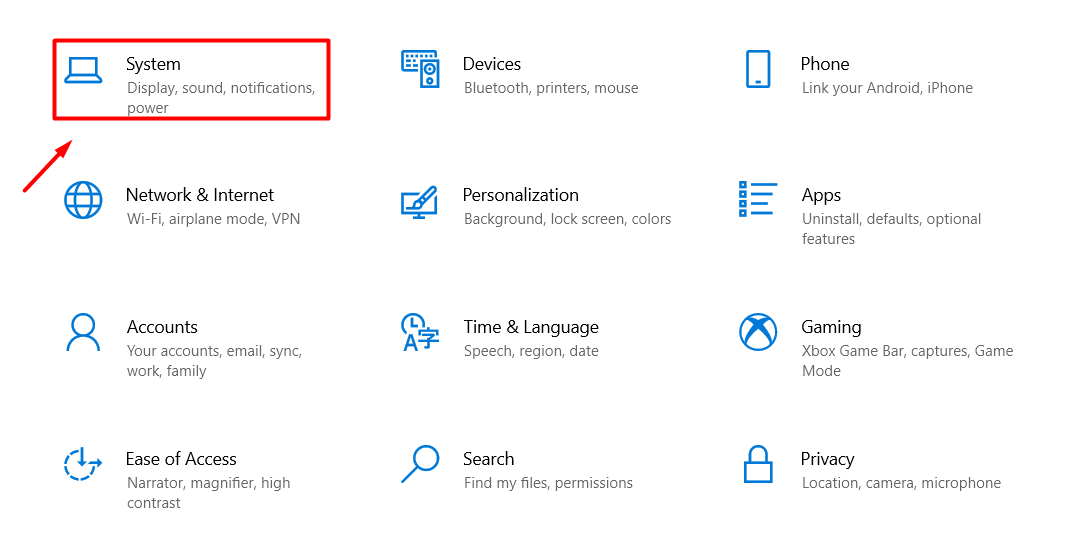
- Select System
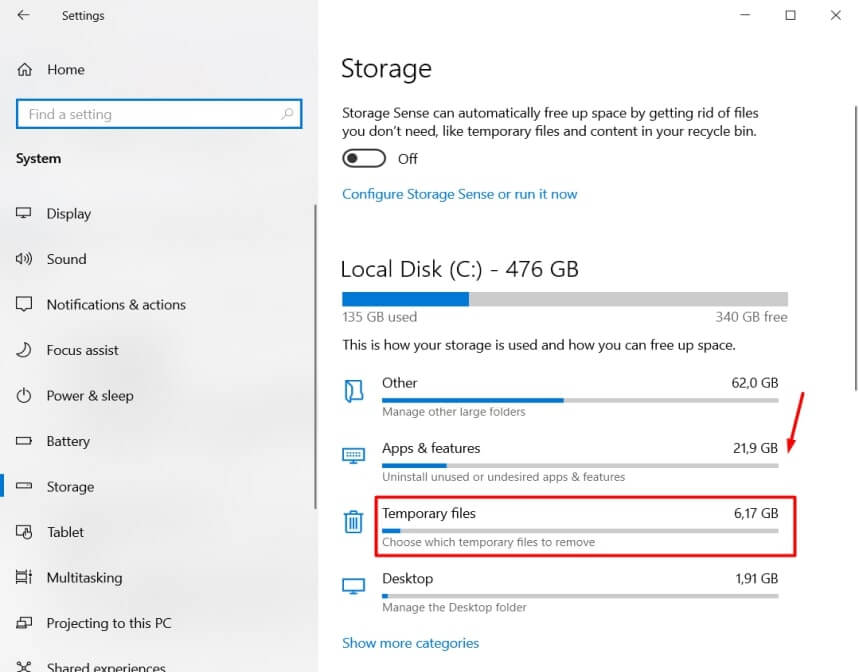
- Select Storage
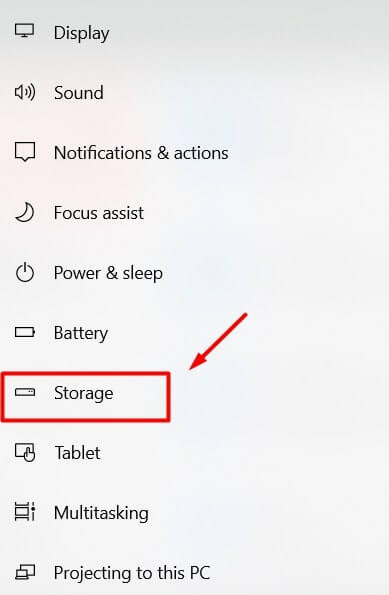
- Under Storage, open Temporary Files
- Check System error memory dump files
- Optionally also check System error minidump files
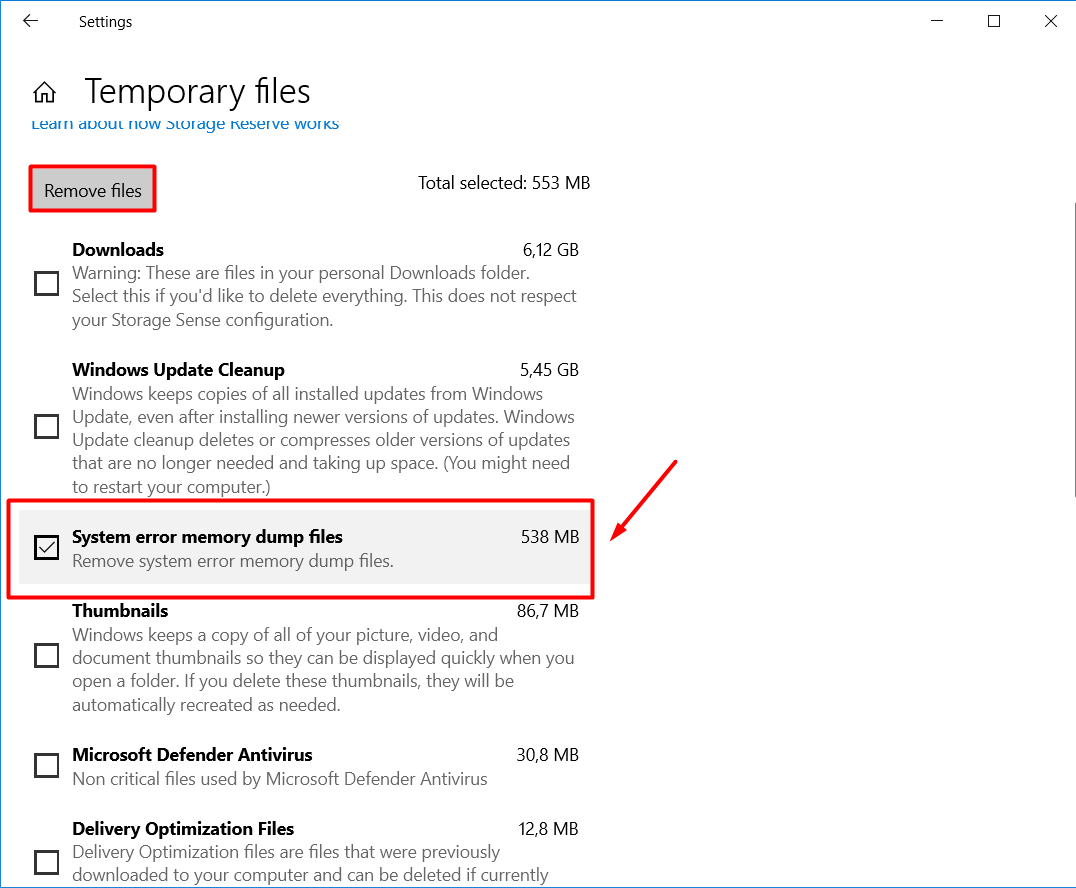
- Click Remove files
Use Command Prompt
- Open the Start Menu
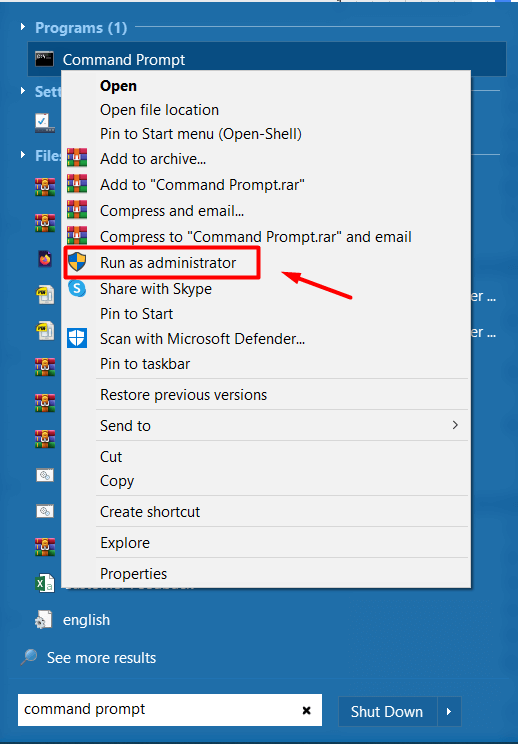
- Search Command Prompt, right-click the top result, and choose Run as administrator
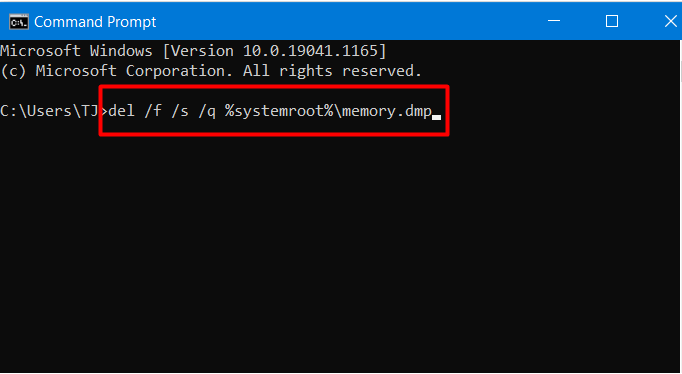
- Enter this command and press Enter:
del /f /s /q %systemroot%\memory.dmp - To also clear minidump files, run this and press Enter:
del /f /s /q %systemroot%\Minidump\*.*
Delete memory dump files manually from their folder
- Open the Start Menu and search for Control Panel
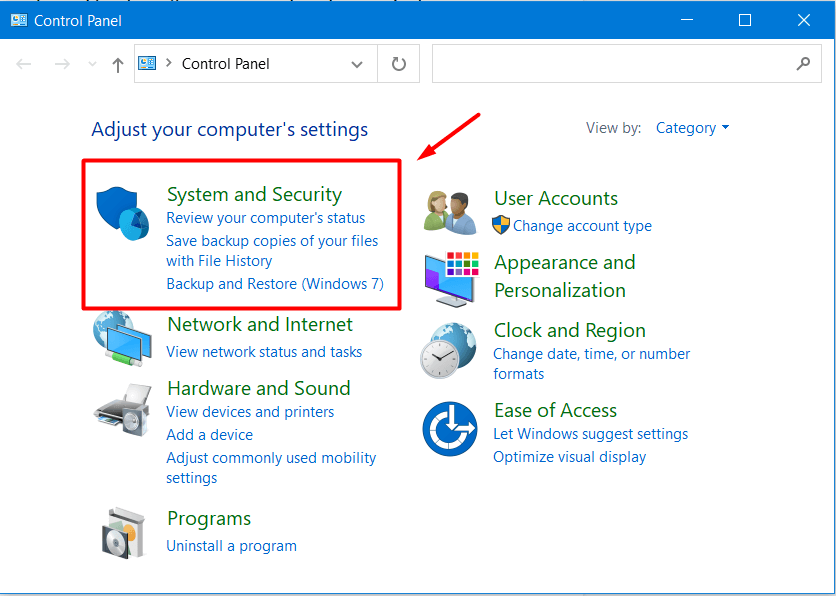
- Open the top result and go to System and Security
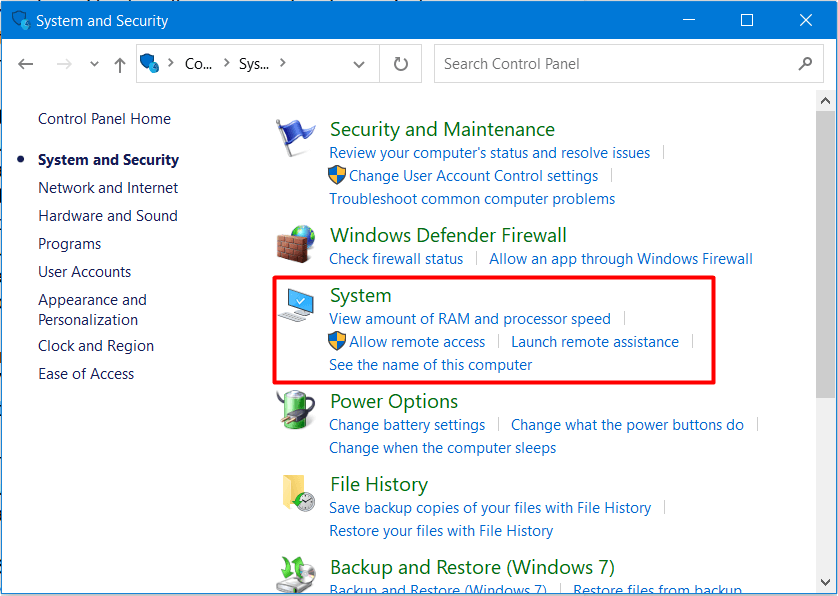
- Select System
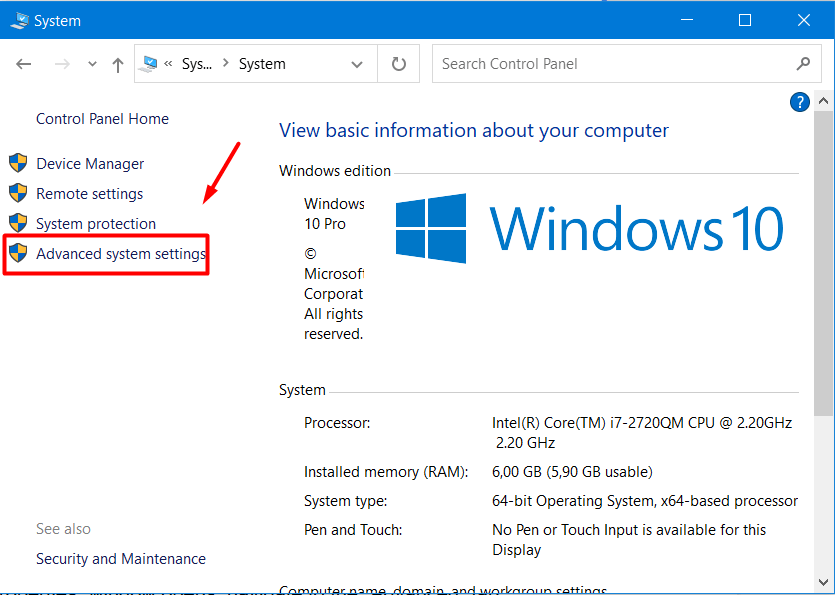
- Open Advanced system settings
- Click Settings under Startup and Recovery
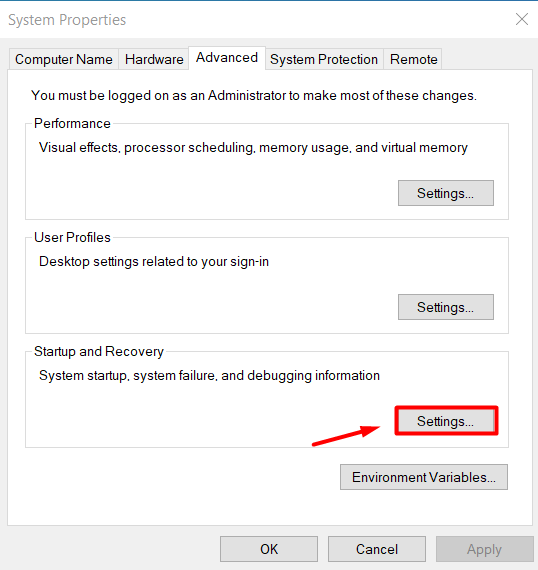
- Look at "Write debugging information," open the drop-down, and note the dump type; this tells you where the files are saved.
- Copy the folder path shown there
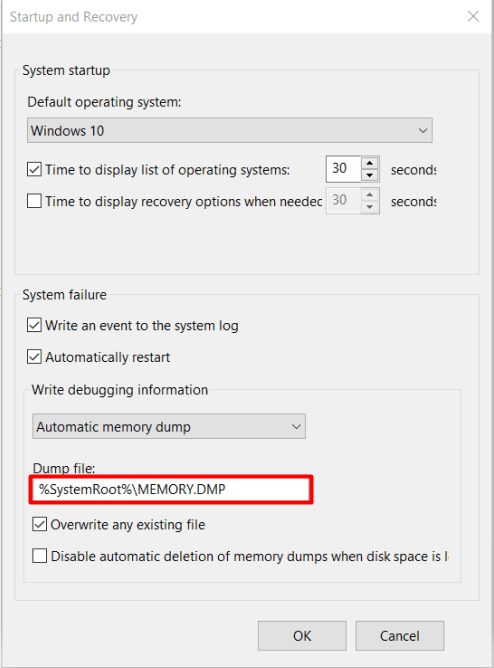
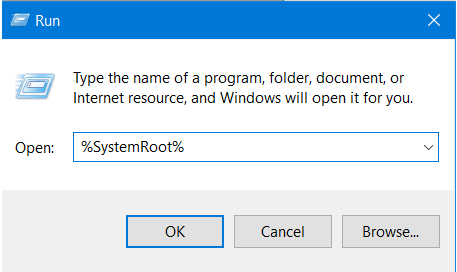
- Press Win Key + R, paste the path, and press Enter
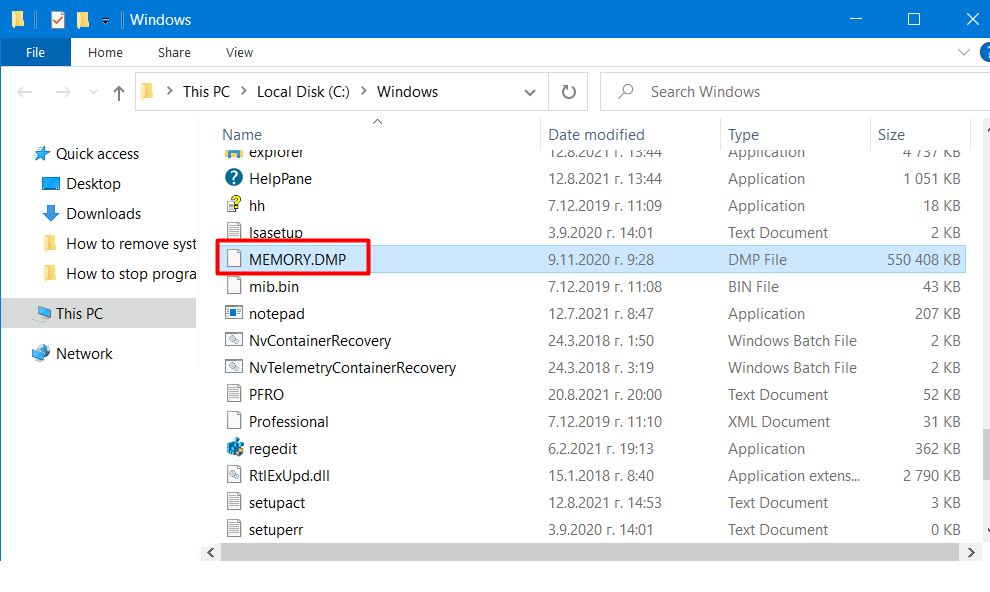
- Find MEMORY.dmp and delete it for good
- Restart your PC so the files clear out completely
Disable crash dumps going forward
- Open the Start Menu and search for Settings
- Open the top result, then click System
- Choose About
- Under Related Settings, click Advanced System Settings
- In the System Properties window, go to the Advanced tab
- Click Settings under Startup and Recovery
- Under Write debugging information, use the drop-down and pick (none)
After this change, Windows will stop generating memory dump files entirely. You can always switch the setting back later if you need dumps for troubleshooting.
Clearing out old memory dump files is a quick way to reclaim disk space. If your PC hasn't crashed recently, or you already stay on top of cleaning junk files regularly, chances are there won't be much to remove in the first place. Tools like Revo Uninstaller Pro make this kind of routine cleanup fast and painless.

6 Comments
There is one thing that always puts me off pressing that button and that is the warnings about what you are about to do. It asks me if I really want to do it, which I do, but I feel if I do click it and I lose a lot of files or end up with a blue screen, I won’t be able to kick myself hard enough. What would be great is advice on clicking that button when you get asked if you REALLY want to do it.
Ein sehr hilfreicher Artikel. Leider musste ich erst Ihre Mail übersetzen, da ich kein englisch kann.
Ik kan niet alle Engelse woorden vertalen naar het Nederlands.
Also, you should mention that before delete them, send dump files to Microsoft is a good idea, because there are teams which review them and they try to investigate the cause and resolve it either through Windows Update or notify you about possible solution in Action Center
very helpful indeed ..too many junk fies and history
plus edivence remover …thank you REVO
what about how to fix non volatile memory is about full??